In today’s online business live chat support system are the most important part of our website. It will connect with our customer in a real time and increases our trust and revenue. There is some Add-on plug-in in the market like Zendesk, Freshdesk and Zoho Chat but all these are not free you can pay to use this plugin on your website. But don’t be disappointed, there is some free alternative you can use these plugin on your website without spending a single penny.
Page Contents
How it works
How to Embed Facebook Messenger Chat widget in blogger
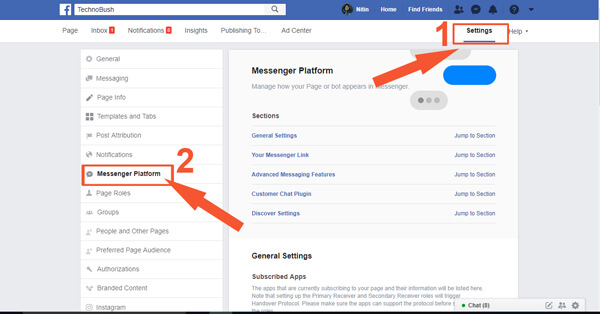
Step 1. Log into your Facebook page and select the setting option as per show in the image.
Step 2. After click on setting option, Facebook Page setting window open and you can see lot’s of an option are available but you can select on Messenger Platform in the right side show in the image.
First of all, you need to whitelist your domain it’s an important part without whitelisted you couldn’t use Messenger Chat widget in your website. To whitelisted your domain you have an SSL certificate. Means its work on https sites not in HTTP. In blogger, you can get free SSL certificate so you don’t worry.
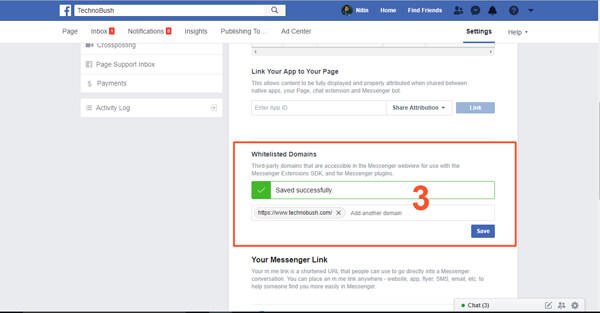
Step 3. To whitelisted your domain select Messenger Platform and you can see all the option related to Messenger. Scroll a little bit and you see the option Whitelisted Domains.
Add your Domain in the input field and click on save button. You can add more than one website in the whitelisted domains field.
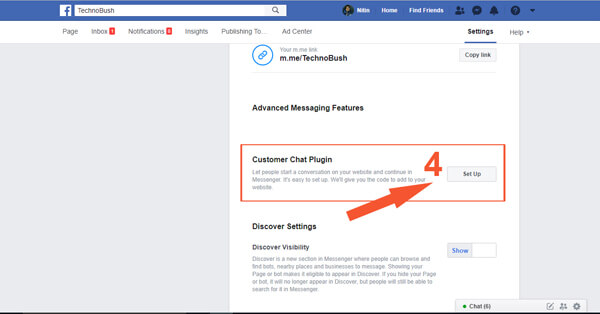
Step 4. After Whitelisted Domain scroll little bit more and you can see Customer Chat Plugin option click on Set Up button as you see in the image.
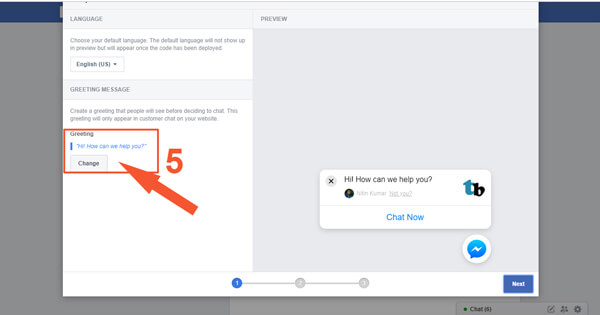
Step 5. When you click on set up button a new pop up window open. The first part of this popup window you can change Greeting message or you can use the default message after that click on Next button. In the second part, you can customized color for Facebook Messenger Chat widget and click Next.
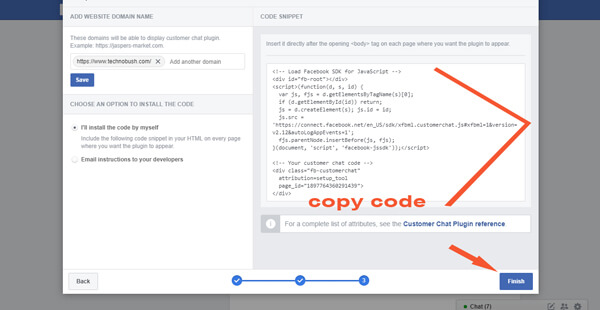
Step 6. In the third part and last part of the popup window, you can see some JavaScript code select and copy all the JavaScript code and click Finish. Paste this code in your computer because we use this code later in our website to Embed Facebook Messenger Chat widget.
The first part of this tutorial is finished, now go to the next part. In this part, we add JavaScript code earlier copy in Facebook in blogger.
Also Read : How to add contact us page in blogger
Embed Facebook Messenger Code in Blogger
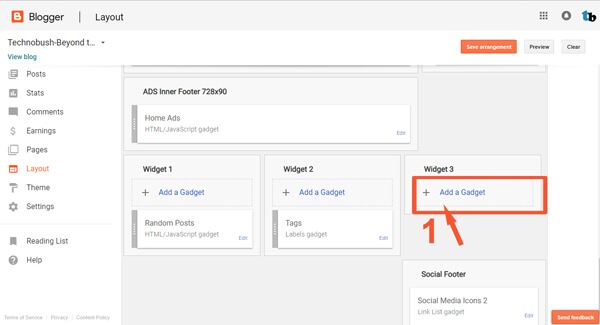
Step 1. Navigate to Layout option in a blogger. After clicking theme Layout window is open according to your blogger theme. In Layout, we add a blogger gadget widget for this click on Add a Gadget option in sidebar right or in footer widget according to your theme.
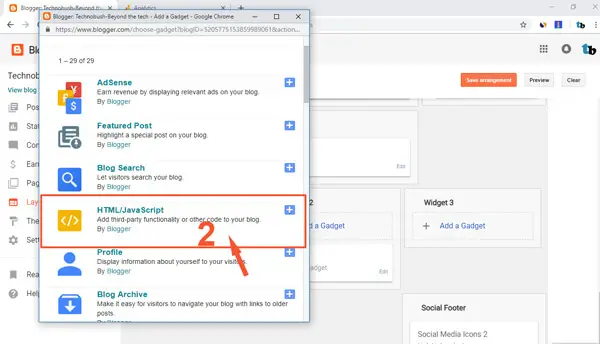
Step 2. A new popup window open when you click on Add a Gadget. Select HTML/JavaScript option.
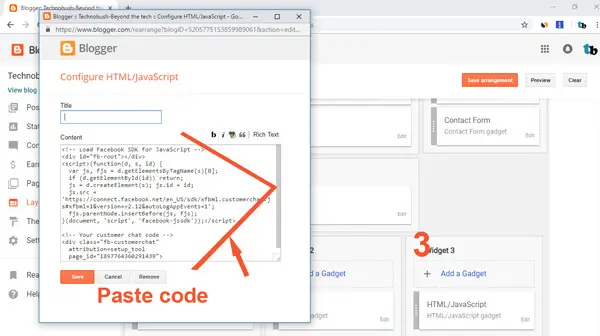
Step 3. After select HTML/JavaScript you see new popup window open. In this window, you can add customized HTML or JavaScript code to increase functionality in your blogger website, but in these case, we add Facebook Messenger chat widget code. Which we copy earlier when we set up Customer Chat Plugin in Facebook. Paste that code in the text area and click on save button.
Step 4. Finally, click on save arrangement and voila you did it. Now in your blogger website, Facebook Messenger Chat widget will be embedded, visit your website and check it’ work.
Conclusion
Facebook Chat widget help your online business to communicate with your viewer in real time and increase your branding and trust toward your visitor. Without spending money on another realtime communication app like zendesk and Zoho Chat.
Must Read
not working
Follow the steps properly it will work.
thank you for this article. I follow all steps and it work in my blogger website.
Wow, Nitin Kumar u r AWESOME. This was so easy to understand and do. It really works. Thanx so much!
Easily got the code but not working on my site (wrestlingattitude.com). Any help?
I think you cannot added your domain(werstlingattitude.com) to whitelisted in Facebook page setting.Third party domain are only accessible through whitelisted in Facebook for security reason. Follow step 3 to configure and added your domain in whitelisted.
Nice info… i’mma try it first, hope it’ll work
Thanks for the article anyway
Thank you. This was very helpful for me to setup the facebook messenger on an Astrologer website that I was working on.
The above step is working perfectly fine but if you need just the code without having to follow the above steps, visit https://www.educativehelper.com/2019/04/18/how-to-add-facebook-messenger-to-blogger-and-website-pages/
Thanks a lot
It worked, please keep posting tutorials like this..
Great!. Worked perfectly.
Check it here at my site :
https://theguddeeds.blogspot.com
I really can’t thank you enough. My website Al-Ihsan Media looks great with this tutorial.
Thank you for an easy way to embed the Facebook plugin for Blogspot